Howdy! Hope you all had a great Thanksgiving! I know I did... my family's greatest strength is finding and preparing delicious food, so of course our Turkey Day dinner was delicious!
So by now, my family has caught on to me, and figured out that while I can make mashed potatoes or green bean casserole, my real forte is baking. Naturally, that meant a Thanksgiving day dessert!
I thought long and hard about this one, wavering between pie (which I've never done) and cake, which is my favorite. I finally decided to make a turkey cake, dinner style, to surprise the family.
For example:
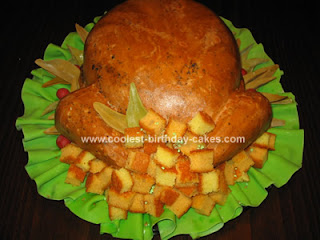
found here.
But my mom decided that might be a little too weird, even for our family. So instead, I went for a LIVE turkey cake. Much more aesthetically appealing, no?
I started with a basic recipe for White Almond Sour Cream cake, and added my own changes.
2 boxes spice cake mix (the original obviously calls for white cake mix, but I thought spice would be more festive)2 cups flour
2 cups sugar (I used Splenda granulated - no need to add any more calories than are already present!)
1 1/2 tsp salt
2 2/3 cups water
1/4 cup vegetable oil (I didn't have any, so I just melted some butter and used that instead.)
2 tsp vanilla extract
2 tsp almond extract
1 cup sour cream (the original calls for 2 cups, but I substituted a cup of pumpkin instead)
1 cup canned pumpkin
8 egg whites (you can use 6 whole eggs instead, since you don't have to worry about them coloring the white cake, but it's a few less calories to use only the whites)
Preheat the oven to 325. Grease your pans. (An important step I forgot, but luckily my mother is magic at getting cakes out of pans.)
Stir all the dry ingredients together with a whisk. (or a whisk attachment) Add in all the other ingredients, and mix on medium for about 2 minutes. Make sure to scrape down the sides and bottom, especially if you're using a stand mixer. Oh, and since there's so much batter, don't put the mixer on medium right away. Work up to it. Believe me.
I poured the batter into the two halves of my Wilton Ball pan, and also into a large bundt pan. Throw the pans in the oven, and wait FOREVER for them to finish cooking (There's no real bake time for these, but plan on about 40 minutes to an hour. Since the ball halves and the bundt cake are all so dense, it takes a little while to cook. Once they're done, let them cool.
When you're ready for decorating, use a knife to level off the tops of the two ball halves, so they'll sit evenly when placed on top of each other. Also level off the bottom of one of the halves, so it has a base to sit on.
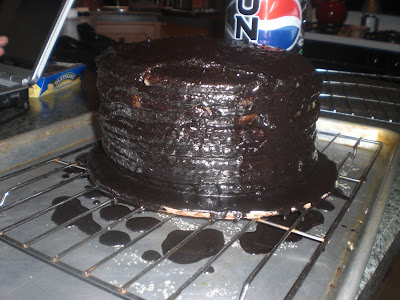
Smear a little chocolate icing on the leveled bottom and attach to the cake board or plate. Smear more chocolate icing on the top of the ball, and attach the top half. ***I iced the bottom half a bit before putting it on the board, because it is nearly impossible to do once the cake has been attached. Ice the whole ball in chocolate icing.
Measure the bundt cake so you can cut off about a quarter while still giving the turkey a tail that shows above his head. Smear more chocolate icing on the bottom of the tail to attach it to the plate. From the leftover bundt cake, trim a head and neck shape, and attach to the body. I used dowels to help give it more support, since it had very little cake to sit on.

Once all the pieces have been attached, the decorating is easy. I created different colors out of vanilla icing and food coloring. Then I just painted them in alternating stripes for his tail.

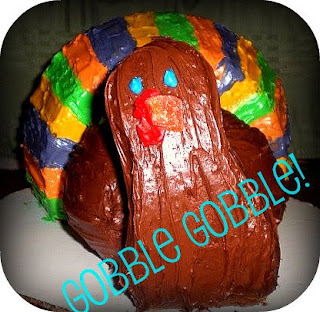
Then I covered his head in chocolate icing, and used a little blue icing tube to pipe on eyes. His beak is a jelly orange slice cut in half, and his waddle is some red cookie icing.
Tada!

 It was okay though, they still tasted delicious, and were super moist!


 pumpkin.
  A pumpkin spice cake that looks like a pumpkin. I mean, duh.